

Gift subscriptions are a great way to have your most loyal fans spread the word, grow your audience, and further support you.
Outpost lets you offer gift subscriptions and handles the work of collecting the fees, creating an account for and notifying the recipient and thanking the giver.
And when the gift subscription gets close to expiring, we notify the giver to give them an opportunity to re-up the gift, and if they do not, we write the receiver a few days before expiration to ask them to pay themselves.
Setting up gift subscriptions is easy, and the process is outlined below. Once you have chosen what plan gift subscription buyers are gifting (e.g. how much does it cost?), you can include buttons to the gift subscription page from any post or email.
You can also create buttons that show up in emails or posts or both, asking people to buy a gift subscription. If you later decide to change what the gift subscription costs, your existing buttons will still work and will point buyers to the new plan.
Some things to know about the first version of Outpost gift subscriptions:
- Gift subscriptions are treated in Stripe as one-time purchases, not subscriptions, much like donations are. So they will not show up in your Monthly Recurring Revenue (MRR) or Annual Recurring Revenue statistics (ARR). This is likely a better way to register them because gift subscriptions typically have a much lower renewal than normal subscriptions.
- Gift subscriptions start at the moment they are purchased. This is by necessity currently, but we anticipate being able to offer better options in the future as Ghost's functions progress.
- Gift subscriptions can be purchased by current subscribers or by those who do not have a subscription.
- Gift subscriptions currently cannot be purchased for someone who already has a paid subscription. This is checked before a purchase is made.
- You will get an email from Outpost when someone purchases a gift subscription, telling you who purchased the gift and who got it.
How to Enable Subscriptions:
There are 4 things you need to do to start selling Gift Subscriptions. This takes about 5 to 15 minutes to set-up.
A) Approve and optionally customize the email messages sent to gift subscription purchasers and sellers,
B) Create a gift subscription plan,
C) Assign the gift subscription plan, and
D) Promote the gift subscription with buttons in your emails and on the site.
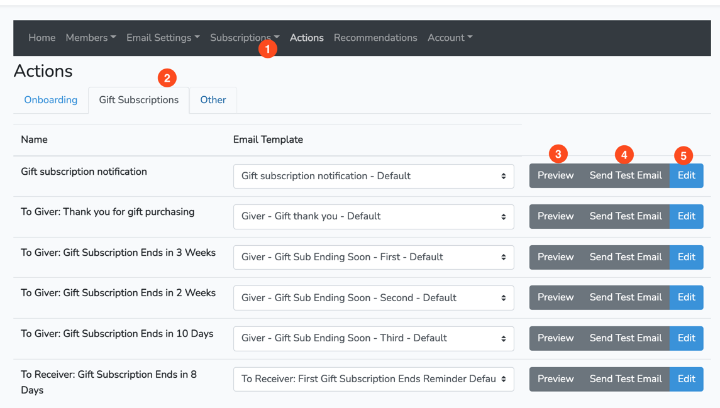
A) Approve and Customize Email Messages
Outpost has a number of emails that get sent out to gift subscription buyers and sellers.
There are default messages that you may want to customize.
To do that, go to Actions -> Gift Subscriptions. You can then Preview any message, send yourself a test version, and edit them if you like.
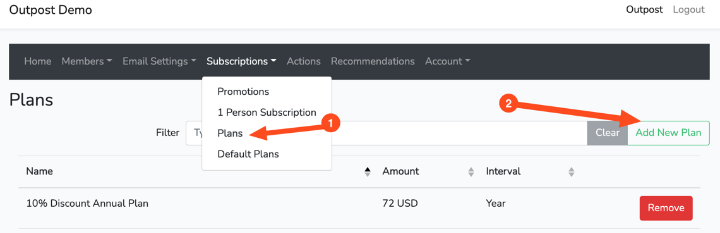
B) Create the Gift Subscription Plan:
- In the Outpost Control Center (OCC), go to the Subscriptions tab and click on Plans.
- Create a new Plan.
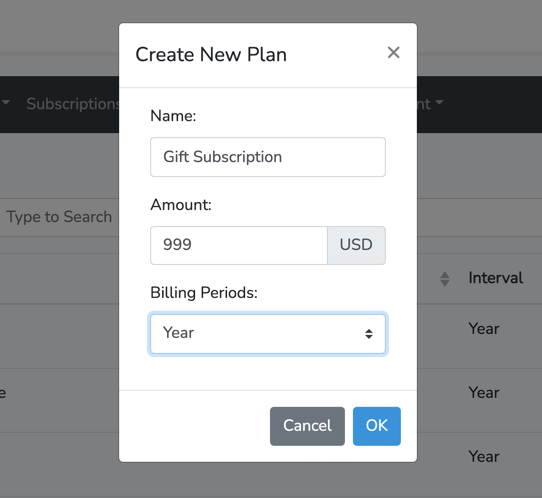
3. Name the plan somehing like Gift Subscription. Choose your price and make it annual. Save it by pressing OK.
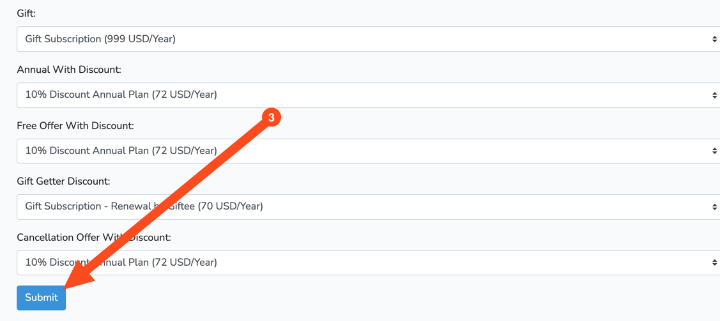
C) Assign the Gift Subscription Plan
In this step you are telling Outpost what plan to use when selling a gift subscription.
- Go to Subscriptions -> Default Plans
- Assign the gift subscription you just made to Gift Subscription.
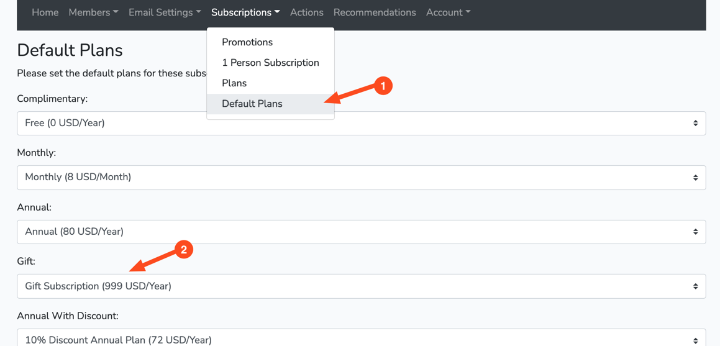
3. Scroll down and press Submit to save it.
D) Create, Save, Share and Re-Use the Gift Subscription Buttons (video explanation at the bottom)
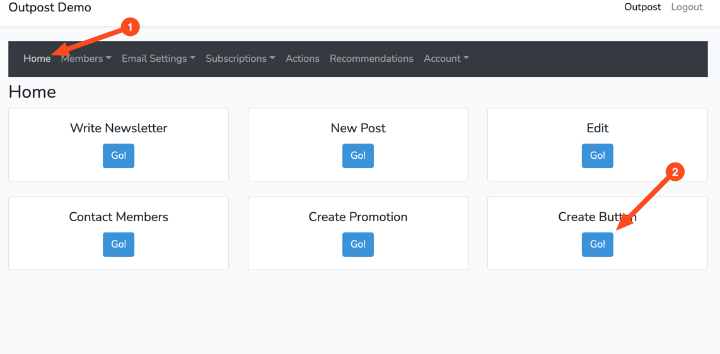
- Go to the OCC homepage by clicking Home in the top left part of the navigation bar
- Press Go under the Create Button.
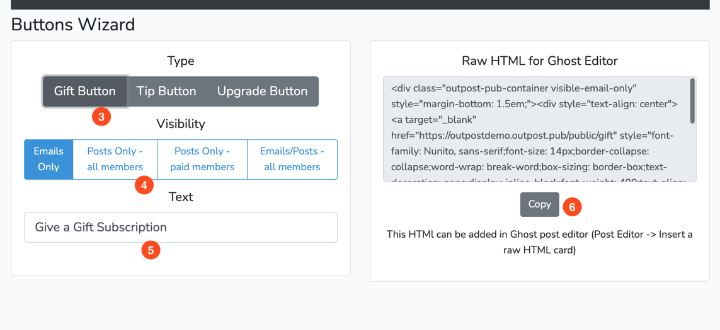
3. Click on Gift Button.
4. Choose what kind of button you want to use. Each shows in different places to different audiences.
5. Change the title of the button if you like.
6. Copy the Button HTML to your copy-and-paste buffer.
7. Go to your Ghost Editor (you can do this from the OCC homepage by pressing New Newsletter or New Post)
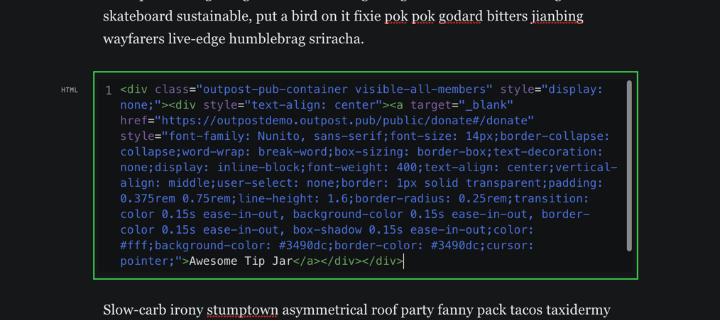
8. In the Ghost post editor, click the (+) to open the card menu. Choose the HTML card.
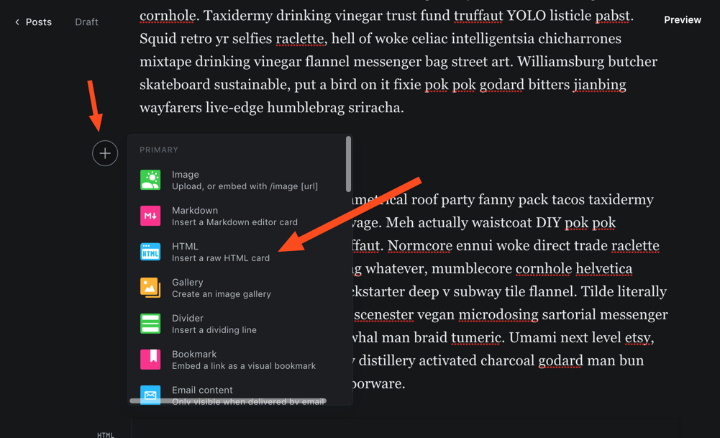
9. Paste the HTML from your clipboard. Then click out of the card by clicking anywhere in the post. The button is now in your post!
10. Go to Preview at the top right of the editor and click it to see how the button looks. If it's a post-only button, look at the desktop and mobile view. If it's an email-only button, look at the email preview and, if you like, send yourself a preview email.
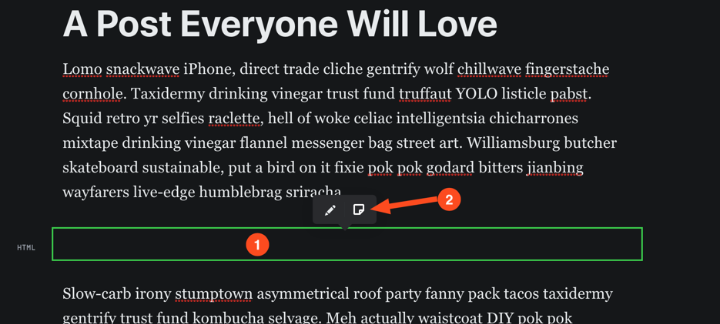
11. To save the button to re-use it later, go back to your editor and click the box. Then click the paper icon on the right. Type in a name you will remember, like "Gift Sub, Email Only". Press Return to save it as a snippet.
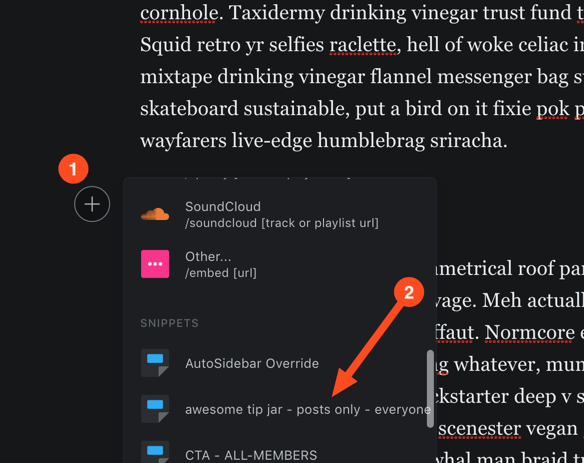
12. To see it in your snippets, go to (+) to open the card menu. Scroll to the bottom and look for the title of the snippet you saved in 10. Select it and it will be inserted into your post.
Here is a video about how to create, save, and re-use these buttons.